Who doesn’t love ice cream? This delicious cold dessert can be served on its own as a refreshing treat on a hot summer’s day or it can be used as a side for another dessert such as a delicious apple pie.
Ice cream is also one of the most versatile sweet foods you can find as the only limit to the varieties available is in your own imagination.
There are many common and popular forms of ice cream, such as vanilla, chocolate, and strawberry.
But if you’re looking for something a little different, why not try this pumpkin ice cream?
Pumpkin is closely associated with the fall season and pumpkin ice cream will make for a perfect dessert during not only fall but at any point of the year.
That’s why we’re going to introduce Dad’s secret (and most yummy) pumpkin ice cream. This recipe is easy to make and anyone who tastes this ice cream will love it!
Let’s get started!
Dad’s Secret (& Most Yummy) Pumpkin Ice Cream
Let’s break down how you can make this ice cream. We’ll list the equipment you need and the ingredients before explaining how to make it.
Yield: 5 cups
Prep time: 10 minutes
Total time: 6 hours and 15 minutes (plus one day)
Equipment
Ice cream maker
Saucepan
Whisk
Large bowl x 2
Ladle
Wooden spoon
Strainer
Ice bath
Freezer-safe container
Hand mixer (optional)
Candy thermometer (optional)
Ingredients
1 can (15 ounces) of pumpkin puree
2 cups of whole milk
2 cups of heavy cream
1 cup of packed brown sugar
6 large egg yolks
1 teaspoon of pure vanilla extract
1 teaspoon of cinnamon
½ teaspoon of ginger
½ teaspoon of nutmeg
½ teaspoon of kosher salt
Method
Now, let’s look at how to make this delicious pumpkin ice cream.
Step One
The day before you plan to make your ice cream, put the bowl of your ice cream maker in the freezer. It’s best to churn your ice cream in a chilled bowl.
The base of the ice cream needs time to chill as well and will benefit from a long period in the freezer, so you may want to make this the day before finishing the ice cream as well.
Step Two
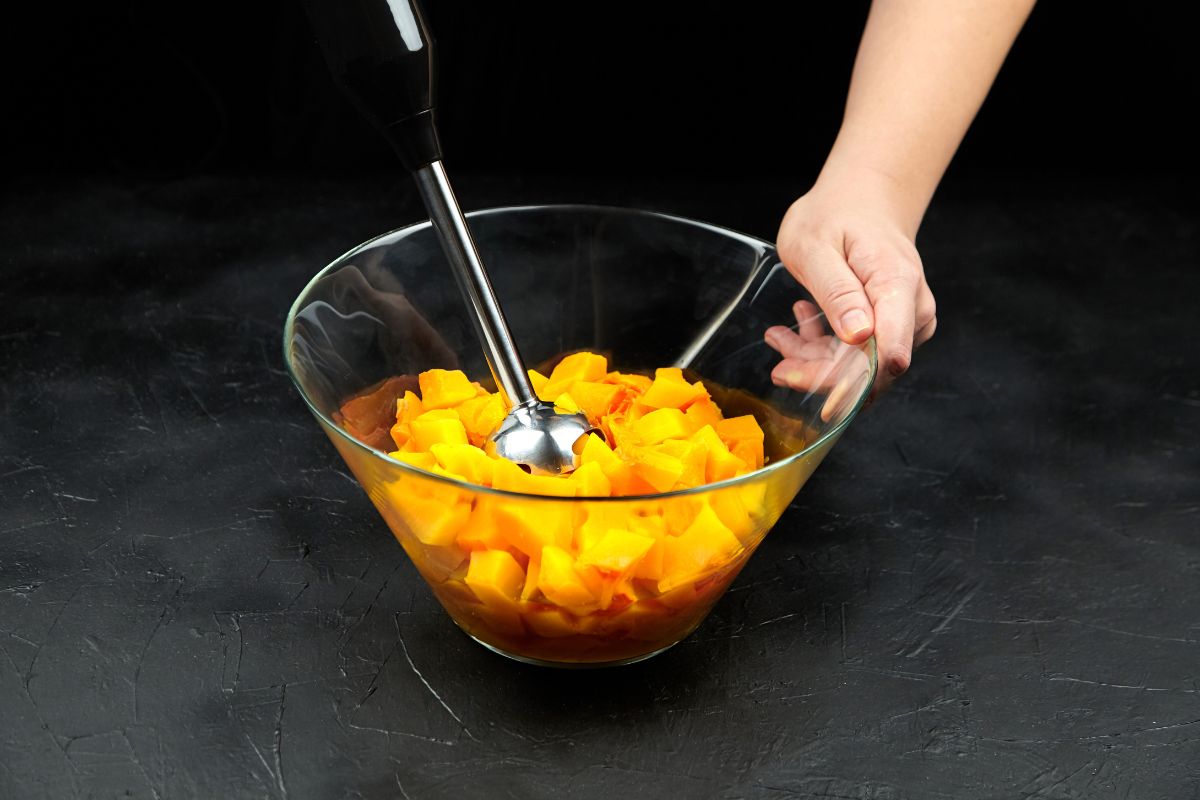
Add your pumpkin puree, whole milk, and heavy cream to a saucepan. Whisk them together and place over medium heat.
Continue to whisk all of the ingredients together but when the mixture begins to boil, remove it from the heat. Set the saucepan aside.
Step Three
Take your large bowl and add the brown sugar and egg yolks. Whisk the ingredients together until the mixture becomes pale and thick ribbons begin to form.
This should take around three to four minutes. If you have a hand mixer, you can use this instead of doing it manually.
Step Four
After the ribbons have begun to form, start adding your pumpkin mixture from Step Two.
You only need to add around half of the pumpkin mixture and add it at a rate of a ladle at a time. Continue to whisk the mixture as you add the pumpkin.
The sugar and egg mixture should slowly warm up as you spoon more of the pumpkin mix.
When you’ve mixed in half of the pumpkin mix, you can pour everyone back into your saucepan and add it to the remaining pumpkin mix.
Step Five
Place the pan with both the combined mixture of ingredients over low heat. Stir it frequently with a wooden spoon as you allow it to warm.
As you stir, the mixture should start to thicken as well.
Don’t allow the mixture to boil or even begin to simmer and turn the heat down further if necessary.
It should take around four to five minutes for the mixture to thicken.
There are two ways to check when your mixture has become thick and warm enough.
If you have a candy thermometer, this will happen when it hits around 170 degrees Fahrenheit.
You can also check if the mixture is thick enough by testing it with your finger.
Coat the back of your wooden spoon with the mixture and swipe your finger through it.
If the action leaves a clean line on the spoon, your mixture should be ready.
Step Six
With the custard mixture thickened correctly, you should now mix in the vanilla extract, cinnamon, ginger, nutmeg, and salt.
Stir the mixture thoroughly so that the spices are well-distributed.
Step Seven
Strain the new custard mixture into a clean, large bowl. Place the bowl over an ice bath and allow the mixture to cool to room temperature.
Once it has thoroughly cooled, cover the bowl and chill for at least three hours, but preferably longer. It doesn’t need to be chilled overnight, however.
Step Eight
Pour your chilled custard mixture into your frozen ice cream maker bowl and churn.
It should take around 15 minutes with occasional scrapes of the side of the bowl, but follow the instructions of your ice cream maker for exact details.
Step Nine
After your ice cream has been churned and has reached the consistency of soft serve ice cream, transfer it to a freezer-safe container.
Place in the freezer and freeze until the ice cream becomes hardened. This will take at least two to three hours.
Final Thoughts
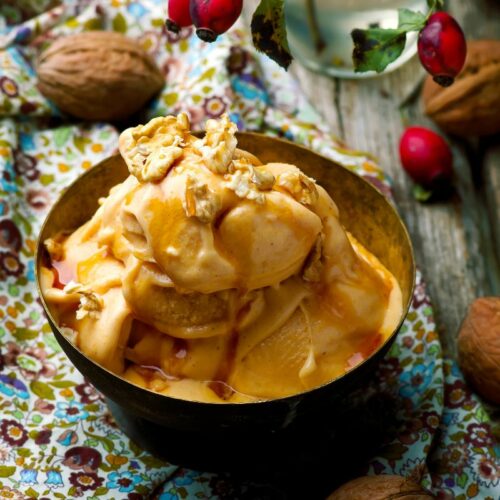
In this article, we introduced our Dad’s secret (and most yummy) pumpkin ice cream.
Pumpkin may not be a flavor that is regularly associated with ice cream but it makes very delicious ice cream.
You will also find that this ice cream is very creamy as the consistency of pumpkin puree is perfect for ice cream.
This is the perfect ice cream for fall. It not only has pumpkin but is also packed with a variety of other fall spices such as cinnamon and nutmeg.
It’s delicious when served with a Thanksgiving pie but can also be eaten on its own.
We hope you enjoy this ice cream!
Frequently Asked Questions
Let’s answer some frequently asked questions about ice cream.
How Long Will The Ice Cream Last In The Freezer?
Store-bought ice cream will last around two to three months in the freezer if it hasn’t been opened.
However, homemade ice cream isn’t professionally sealed so it won’t last this long. Instead, you should aim to consume it within around six weeks.
Can This Ice Cream Be Made Vegan?
There are many vegan ice cream recipes available. They usually switch egg and dairy products for non-dairy milk and thickening agents such as cashews or cornflour.
This recipe isn’t designed to be vegan, however, so we don’t recommend making substitutions as the end results won’t be as effective.
How Long Should The Ice Cream Be Chilled Before Being Eaten?
We recommend chilling your finished ice cream for at least two to three hours before you serve it.
However, the longer you chill the ice cream the better as this will help it set better. If you can, leave it overnight.
The day before you plan to make your ice cream, put the bowl of your ice cream maker in the freezer. It’s best to churn your ice cream in a chilled bowl.The base of the ice cream needs time to chill as well and will benefit from a long period in the freezer, so you may want to make this the day before finishing the ice cream as well.
Add your pumpkin puree, whole milk, and heavy cream to a saucepan. Whisk them together and place over medium heat.Continue to whisk all of the ingredients together but when the mixture begins to boil, remove it from the heat. Set the saucepan aside.
Take your large bowl and add the brown sugar and egg yolks. Whisk the ingredients together until the mixture becomes pale and thick ribbons begin to form. This should take around three to four minutes. If you have a hand mixer, you can use this instead of doing it manually.
After the ribbons have begun to form, start adding your pumpkin mixture from Step Two. You only need to add around half of the pumpkin mixture and add it at a rate of a ladle at a time. Continue to whisk the mixture as you add the pumpkin.The sugar and egg mixture should slowly warm up as you spoon more of the pumpkin mix. When you’ve mixed in half of the pumpkin mix, you can pour everyone back into your saucepan and add it to the remaining pumpkin mix.
Place the pan with both the combined mixture of ingredients over low heat. Stir it frequently with a wooden spoon as you allow it to warm. As you stir, the mixture should start to thicken as well.Don’t allow the mixture to boil or even begin to simmer and turn the heat down further if necessary. It should take around four to five minutes for the mixture to thicken.There are two ways to check when your mixture has become thick and warm enough. If you have a candy thermometer, this will happen when it hits around 170 degrees Fahrenheit.You can also check if the mixture is thick enough by testing it with your finger. Coat the back of your wooden spoon with the mixture and swipe your finger through it. If the action leaves a clean line on the spoon, your mixture should be ready.
With the custard mixture thickened correctly, you should now mix in the vanilla extract, cinnamon, ginger, nutmeg, and salt. Stir the mixture thoroughly so that the spices are well-distributed.
Strain the new custard mixture into a clean, large bowl. Place the bowl over an ice bath and allow the mixture to cool to room temperature.Once it has thoroughly cooled, cover the bowl and chill for at least three hours, but preferably longer. It doesn’t need to be chilled overnight, however.
Pour your chilled custard mixture into your frozen ice cream maker bowl and churn. It should take around 15 minutes with occasional scrapes of the side of the bowl, but follow the instructions of your ice cream maker for exact details.
After your ice cream has been churned and has reached the consistency of soft serve ice cream, transfer it to a freezer-safe container.Place in the freezer and freeze until the ice cream becomes hardened. This will take at least two to three hours.
Hello, I’m Jenna Hansen, the creator of ImpatientFoodie.com. As a mom of two, I know how hard it is to plan meals everyday, especially healthy, tasty, and interesting foods that the whole family will like.
This is what inspired me to create ImpatientFoodie.com. I wanted to share my recipes, and my love of good food with the world.
I hope that you love reading about our dishes as much as I have enjoyed making them, and start making a change to your lifestyle today with balanced, healthy, and oh-so delicious meals.